One of the most often requested applications for the team at Alces Flight is Galaxy. This open-source framework for running bioinformatics jobs has a large user following and active community, but is also one of the more difficult to install. As we are unable to pull Galaxy into the Alces Gridware Project due to its unique requirements we sought help from bioinformatics experts in the CompBioMed team at UCL this past September to create a quick package install guide for those using Alces Flight on Amazon Web Services. Thanks to their input we’re happy to present a guide for a single-user installation of Galaxy with Alces Flight Compute running on AWS.
Prerequisites
This guide is designed for those who already hold an AWS account and are subscribed to the Alces Flight Solo product. Brand new to all of this? Then check out our documentation on launching a HPC cluster on AWS.
A bit about Galaxy
The Galaxy application is described as an open-source, web-based platform for data intensive biomedical research. Galaxy has grown to be one of the most popular applications in life sciences and can be installed and configured in a few different ways. In this guide we’re going to look at one of the easier configurations, a single-user installation that runs as your user on the cluster login node. This could be extended to work with compute nodes by integrating with the cluster job scheduler or using Galaxy’s own job runner, Galaxy Pulsar.
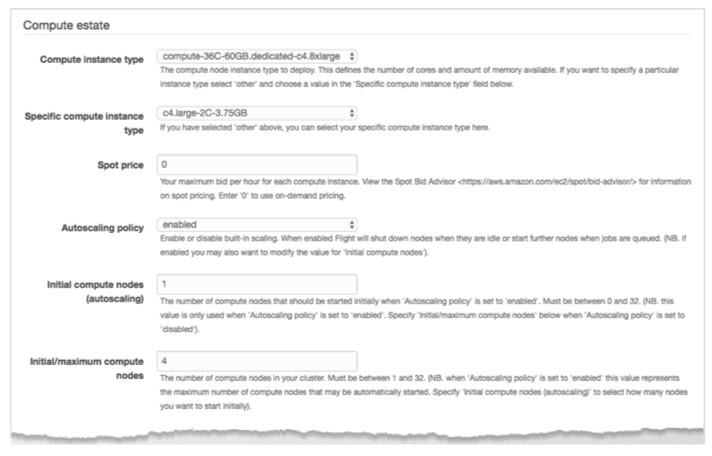
Recommended AWS CloudFormation Selections for Compute Estate
When launching your Alces Flight Solo (Community Edition) cluster we’ve found some recommended settings and selections within the CloudFormation template outside of our standard configurations that will result in a successful installation. Never worked with CloudFormation before? Then check out our guide here.
Our recommended settings for Compute Estate within the CloudFormation template are as follows:
Once your HPC cluster has been created you are set to login and commence Galaxy installation. First time logging in? Check out our documentation on the topic.
Installing Galaxy
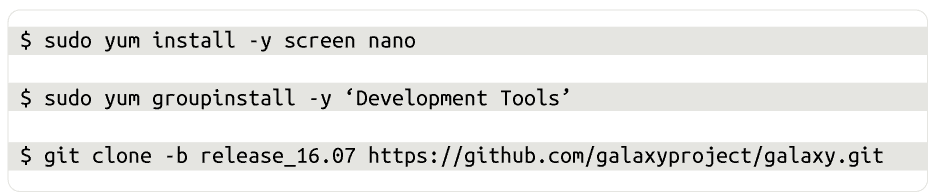
We will be installing Galaxy Release 16.07 from GitHub. To do this from your terminal or shell enter:
After the download has completed you will need to start a VNC session to interact with a graphical desktop. If you do not yet have a VNC tool of choice, or wish to gain more detail on graphical desktop access, check out our documentation here.
All Flight Compute clusters come pre-installed with a GNOME desktop environment that users can start from the command-line as required. Users can launch a new session by using the following command:

Once you have successfully launched your VNC session, open a Terminal from the Applications drop-down to proceed with installation from the CLI.
To commence running Galaxy use the following commands:

This initial launch takes around five minutes to run to completion.
Launching Galaxy from the web browser
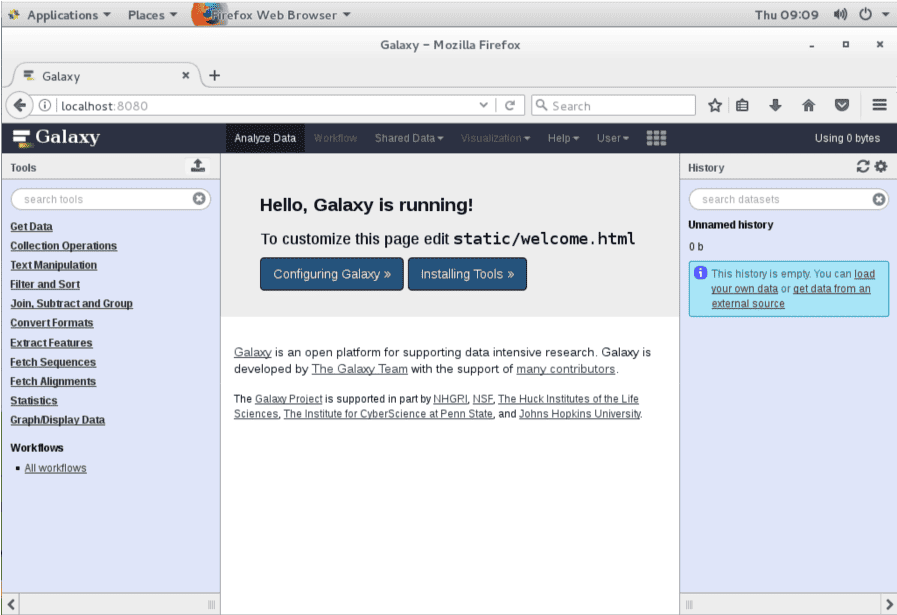
From the Applications drop-down menu select Firefox Web Browser. Once open, type in the browser address:

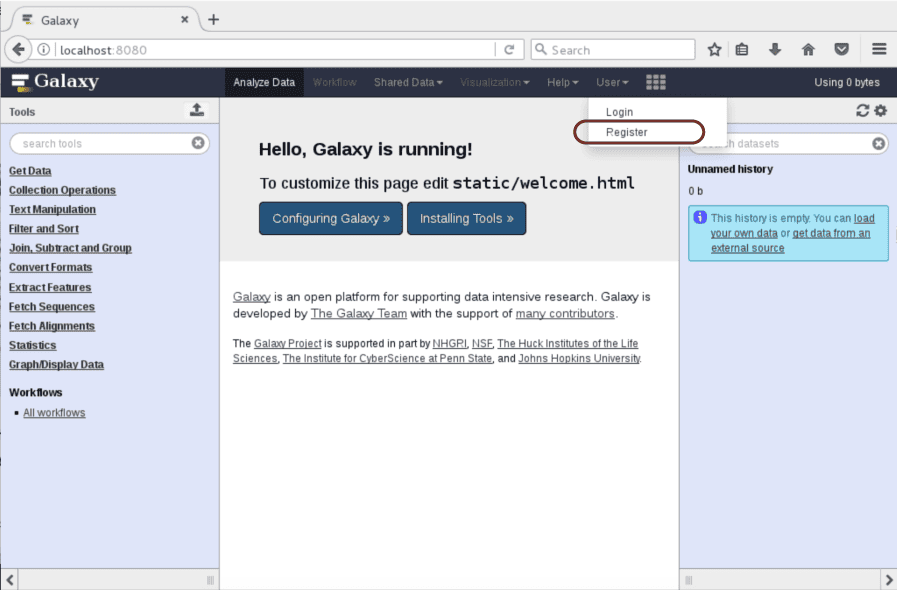
You should see the following screen appear in your browser:
But wait… there’s more…
In order to get the most out of your Galaxy installation you will need to change some of the default settings. First, let’s stop Galaxy running from the terminal inside of the graphical interface. To do so minimise your web browser and select the terminal. Press CTRL+C. You should get a stop message as follows:

We will now copy and rename the sample configuration file so that we can edit it to change the default settings. To so use the following commands:

Configuring Galaxy for optimal use
Enabling VPN Access
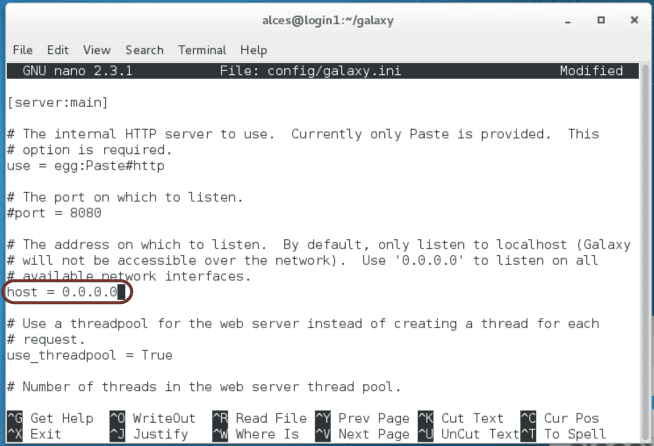
By default Galaxy enables local access only. To allow access from your VPN connected client we’ll modify the configuration to remove this restriction.
To change this configuration type the command:

Using CTRL+W you can search for the line which starts #host:
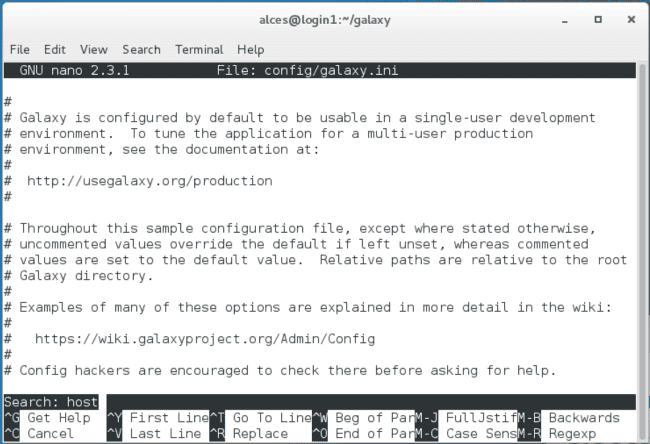
(You can keep pressing CTRL+W until you find the correct line.)
Once you find the correct line replace the #host with the following: host = 0.0.0.0 (as seen below):
Press CTRL+X to save, select Y, and then press Enter.
You have successfully completed your first optimisation to the configuration. You should restart Galaxy by running the following commands:

Promoting yourself to administrator
In order to gain administrative rights to Galaxy you first need to register yourself as a user. To do so select “Register” from the User menu the GUI and fill in the required information:
Now that you are registered you will be able to promote yourself to administrator, which will allow you the ability to install tools. To do this minimise your web browser and go to your terminal within the GUI. Press CTRL+C to stop Galaxy running.
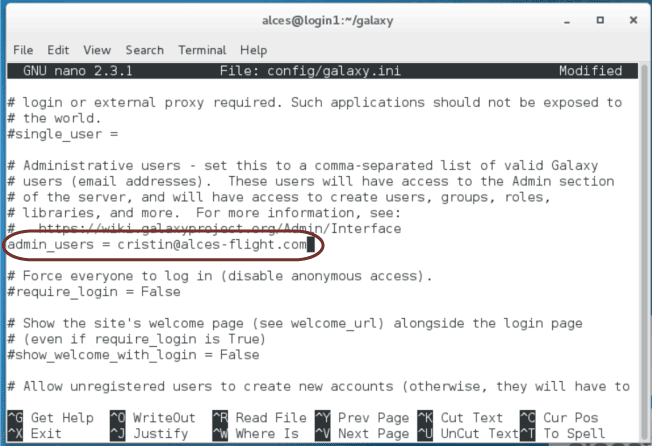
Access your configuration file using the following commands:

Using CTRL+W as your search command and look for the line starting #admin_users. Once found change it to your Galaxy user ID (which is the email address you registered with) following the example below:
Press CTRL+X to save, select Y, and then press Enter.
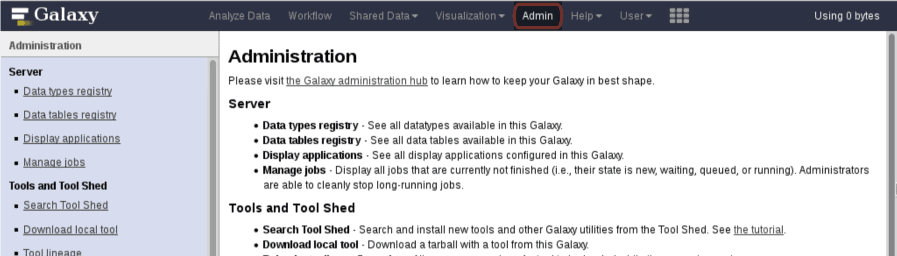
You have successfully named yourself as administrator. Next, restart Galaxy by running the following commands:

Return to your web browser and refresh the page. You should be able to select actions from the “Admin” menu:
Installing Tools in Galaxy
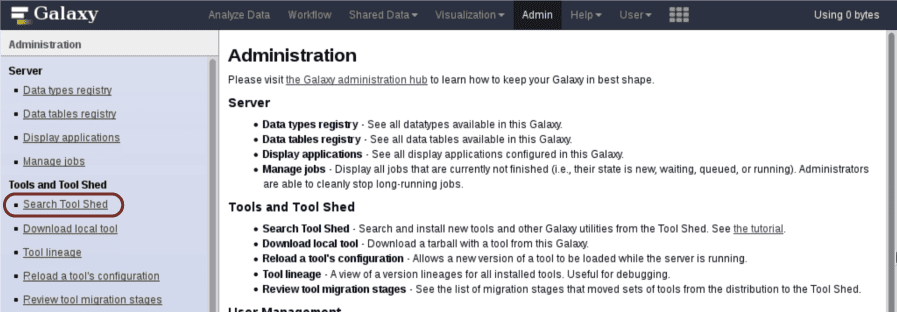
Now that you’ve made yourself an administrator you can install tools into Galaxy. As an example, here’s how you would install a Fasta Manipulation tool:
Select “Search Tool Shed” from the side menu:
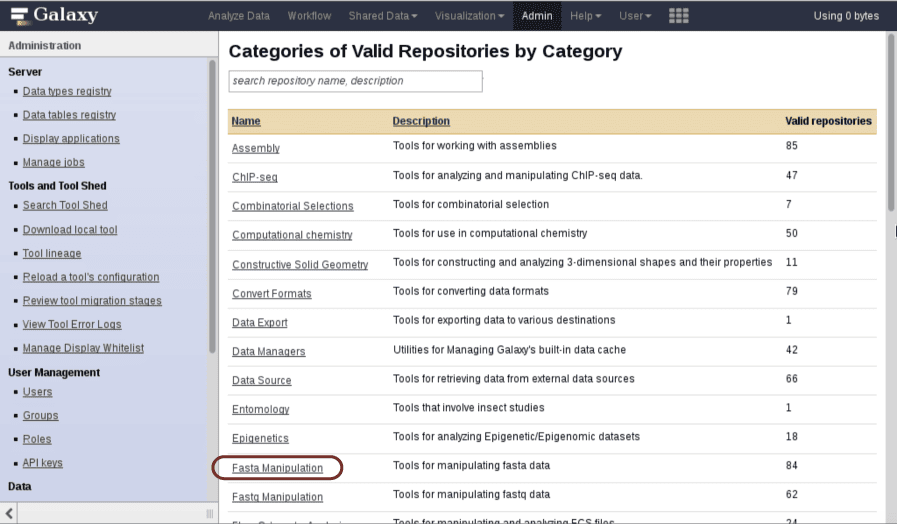
Select “Galaxy Main Tool Shed” (for this example do not utilise the drop down):

Select “Fasta Manipulation”:
Once the Valid Repositories screen appears you can either search for or scroll to the tool we wish to install in this example, which is “fasta_extract”:
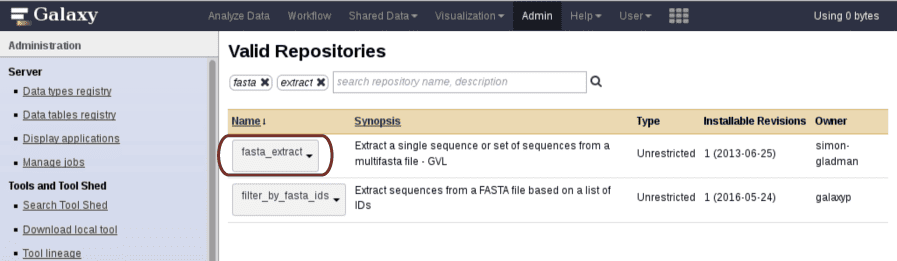
Select “fasta_extract” followed by selecting “Preview and Install”. This will take you to the following preview screen:
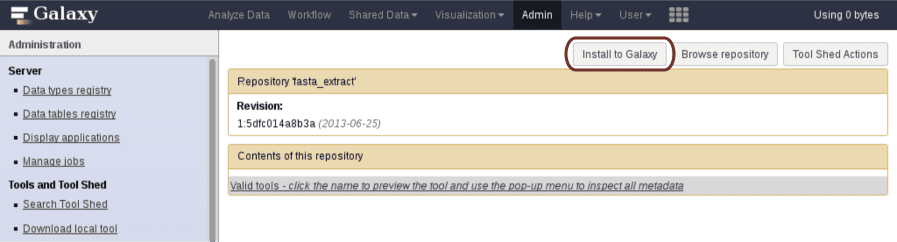
Select “Install into Galaxy”. This will bring up a screen noting your selection and allowing you to choose or enter any additional information. When you are ready, select “Install”:
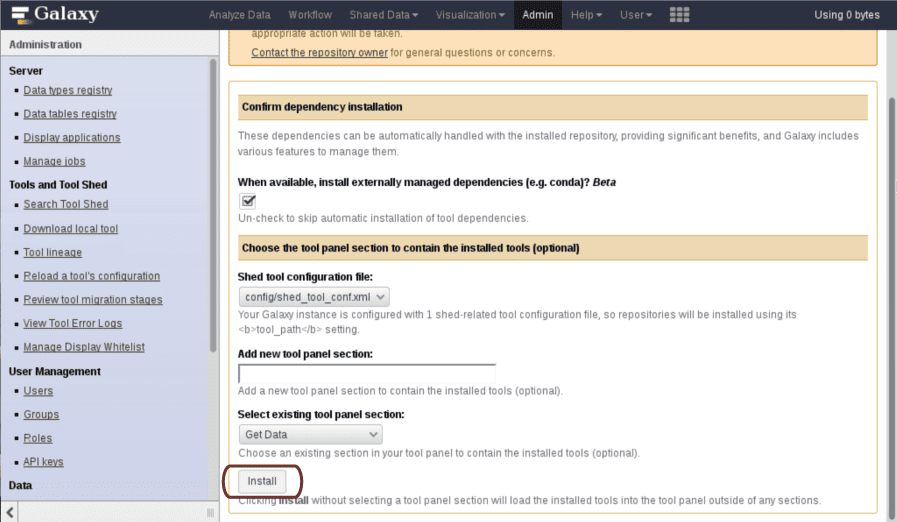
This will take you to a screen allowing you to monitor the process of the tool installation through to its completion:

Finally, with tools it is important to know that not all Galaxy tools are available at all times. Tools are developed independently of the Galaxy team. Don’t hesitate to check the documentation on Galaxy, located here, to find out more.
That’s it, you’re ready to work!
To sum it up
This post provides a basic guide for installing Galaxy on Alces Flight Solo. In this installation you have:
- Started your own personal HPC cluster
- Installed and configured Galaxy
- Connected to the web interface
- Added tools into your Galaxy environment
Once you are up and running with this basic installation here are some enhancements you can consider:
- Adding further storage volumes, and thinking about backup
- Accessing the web interface from other locations
- Installing additional instances as Galaxy worker nodes
Again, thanks to the team at CompBioMed who helped us validate this installation for the use of our Flight Community.